
How long does it take to install a Hensley hitch?
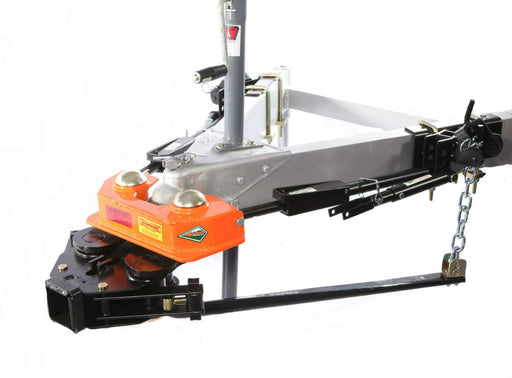
The Hensley Hitch, also known as the Hensley Arrow® or Hensley Cub, uses a linkage system that moves the pivot point to the rear axle and makes it stand out from conventional sway control hitches. The Hensley hitch has been designed for self-installation and does not require a third-party installer.
LEARN MORE ABOUT THE HENSLEY HITCH
Estimated Hensley Hitch Installation Time
The time required for installing a Hensley Hitch can vary depending on your mechanical proficiency and familiarity with the installation process. On average, the installation can take anywhere from 2 to 4 hours to complete. However, this is just an estimation, and it is advisable to set aside ample time to ensure a thorough and precise installation.
Need additional help installing your Hensley Hitch
If at any point you have questions or need additional help installing your Hensley hitch, you can call our support hotline at 800-410-6580.
Here’s a video which describes the installation steps and a link directly to our installation manual.
Overview of Hensley Hitch Installation Steps - Refer to owners manual for complete installation instructions.
1. Prepare the necessary tools: Before starting the installation, gather the required tools such as wrenches, socket sets, torque wrench, safety glasses, and a measuring tape.
2. Remove the existing hitch: If you already have a hitch installed, you will need to remove it before installing the Hensley Hitch. Follow the manufacturer's instructions and guidelines for removing the previous hitch system.
3. Align the Hensley Hitch: Position the Hensley Hitch under the trailer's coupler. Ensure that the hitch is centered and aligned correctly.
4. Attach the hitch head: Secure the Hensley Hitch head to the trailer's coupler using the provided bolts and nuts. Consult the installation manual for torque specifications and tightening sequences.
5. Install the weight distribution bars: Depending on the Hensley Hitch model, attach the weight distribution bars to the hitch's head assembly. Follow the manufacturer's instructions and make any necessary adjustments to achieve the desired weight distribution.
6. Connect sway control brackets: If your Hensley Hitch includes sway control brackets, install them according to the manufacturer's instructions. These brackets help control trailer sway by distributing forces during towing.
7. Adjust and fine-tune: Once all the components are installed, evaluate the levelness and the alignment of the Hensley Hitch. Make any necessary adjustments to ensure proper weight distribution and functionality.
8. Perform safety checks: Double-check all connections, bolts, and nuts for tightness. Confirm that all safety features (e.g., safety chains, breakaway cable) are properly installed and functional.

Hensley Anti-Sway Hitches
-
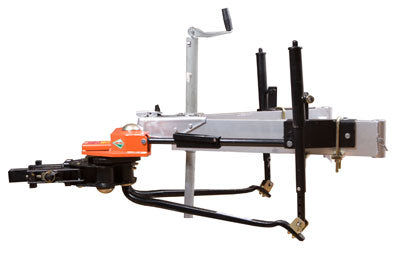
Hensley Arrow Anti-Sway Trailer Hitch
Original price $2,495.00 - Original price $2,495.00Original price$2,495.00$2,495.00 - $2,495.00Current price $2,495.00This is the ORIGINAL Hensley Arrow®, the only hitch 100% Guaranteed to eliminate trailer sway. Specifications of the Hensley Anti-Sway Hitch : So...
View full details -
Hensley Cub Anti-Sway Trailer Hitch
Original price $1,805.00 - Original price $2,105.00Original price$1,805.00 - $2,105.00$1,805.00 - $2,105.00Current price $1,805.00This is the original Hensley Cub®, the only hitch 100% Guaranteed to eliminate trailer sway. Get all the same great features of the Arrow, just in ...
View full details -

Hensley Arrow®/Cub Lot Bar
Original price $250.00 - Original price $260.00Original price$250.00 - $260.00$250.00 - $260.00Current price $250.00Hensley Arrow® and Cub trailer hitch lot bar by Tow Safe with 2 5/16" hitch ball coupler for use in parking lots, dealer visits, or storage solutio...
View full details


